How to enable 802.1X function in windows terminal
- 0 Followed
- 0Collected ,2532Browsed

Network Topology
none
Problem Description
How to enable 802.1X function in windows terminal without installing iNode
Process Analysis
General terminal needs to use dot1x function to install specific software, but windows terminal has its own dot1x function
Solution
The following takes Windows 7 Service Pack 1 as an example to illustrate the configuration of the wireless network card.
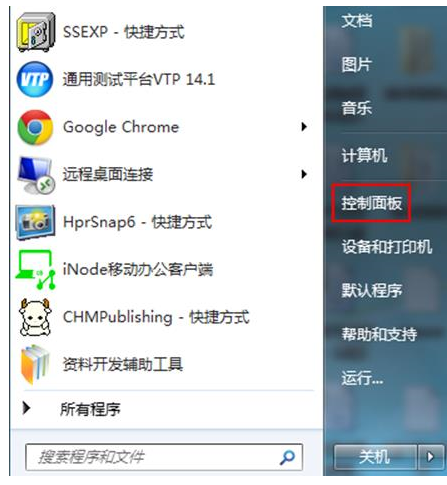
Open the "Start" menu, click "Control Panel" to enter the Control Panel window.
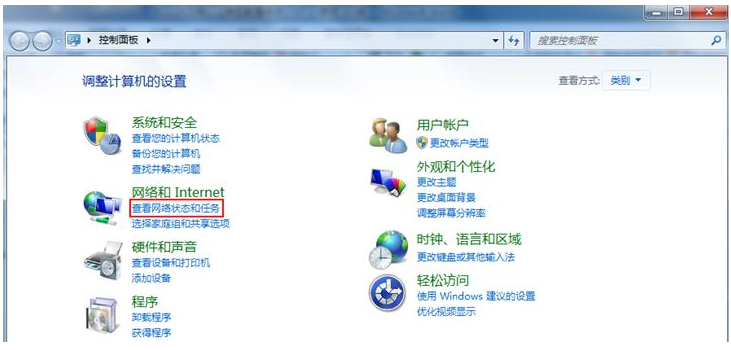
Click "View Network Status and Tasks" to enter the "Network and Sharing Center".
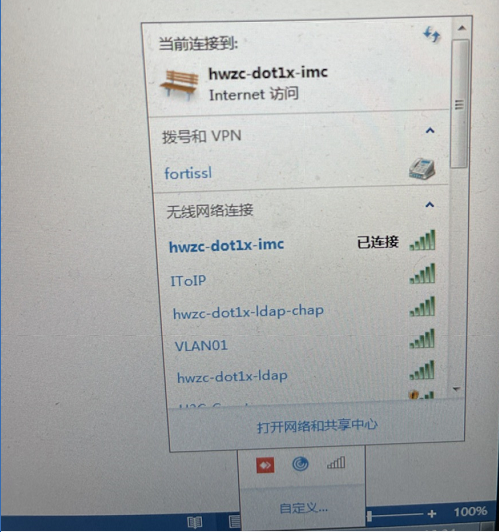
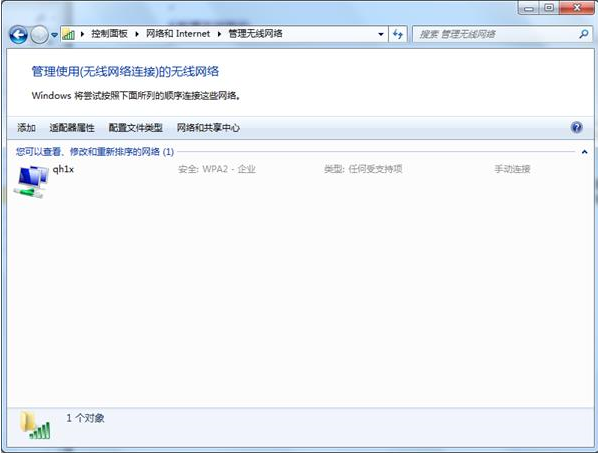
Click Manage Wireless Networks to enter the Manage Wireless Networks window.
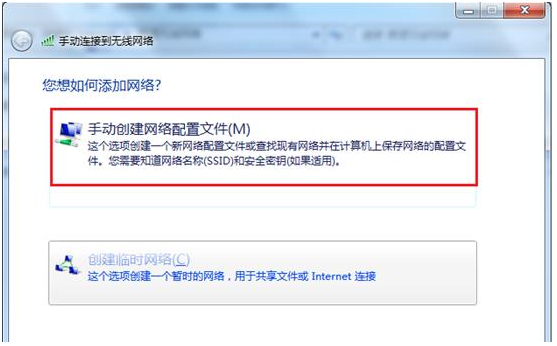
Click the <Add> button and select "Manually create a network profile (M)".
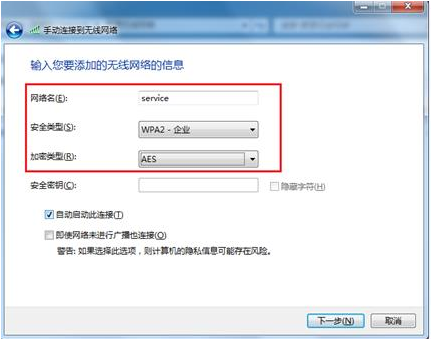
Add wireless network information.
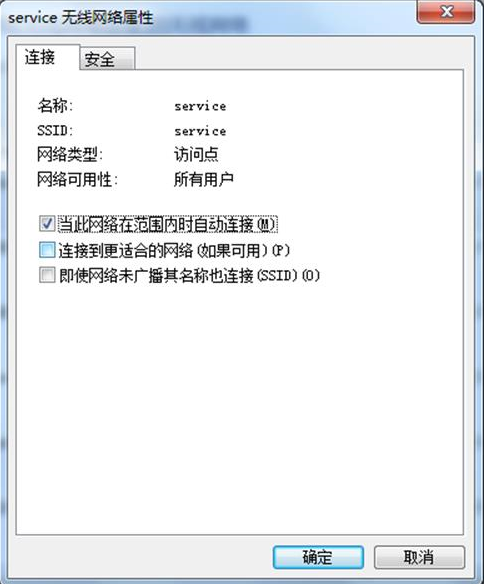
Enter the network name (ssid in the service template): service;
Select security type: WPA2-Enterprise; Encryption type: AES;
Others keep the default configuration and click Next.
Wireless network created successfully
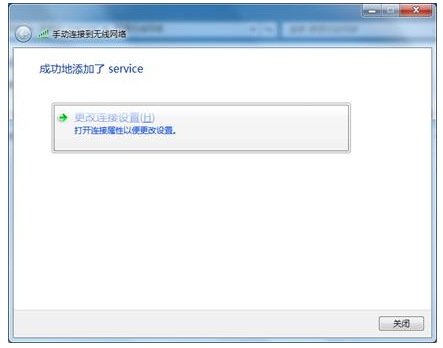
After the network is successfully created, select "Change Connection Settings (H)" to enter the Wireless Network Properties dialog box.
Click the "Security" tab, select "Microsoft: Protected EAP (PEAP)" in the "Select Network Authentication Method" drop-down box, and then select "Remember credentials for this connection every time you log in" Uncheck the box.
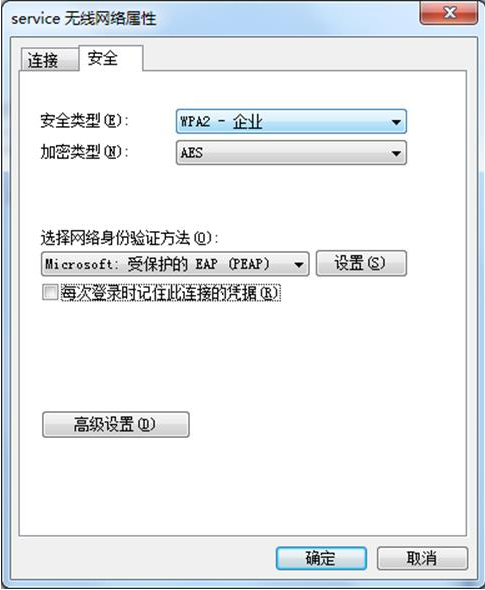
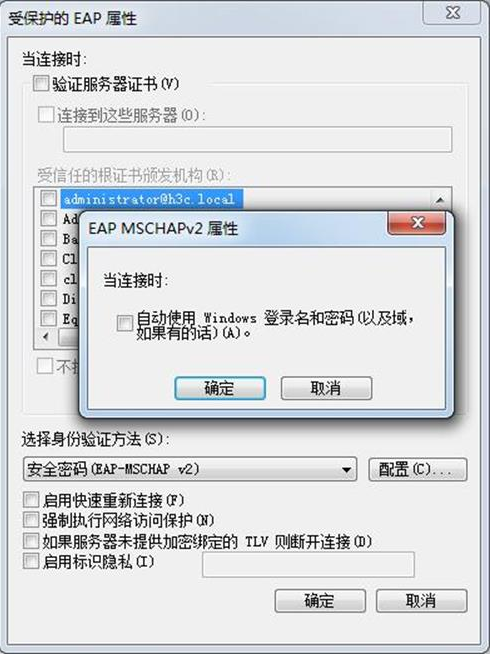
Click the <Settings> button to enter the "Protected EAP Properties" dialog box.
Uncheck the check box in front of "Verify Server Certificate (V)";
Uncheck the checkbox in front of "Enable fast reconnect";
Click the <Configure> button next to "Select Authentication Method (S)";
In the pop-up "EAP MSCHAPv2 Properties" dialog box, uncheck the check box;
Then click the <OK> button to return to the "Protected EAP Properties" interface, and then click the <OK> button.
In the Wireless Network Properties dialog box, click the <Advanced Settings> button to enter the Advanced Settings dialog box. On the 802.1X Settings tab, select Specify Authentication Mode, and then select User Authentication from the drop-down list.
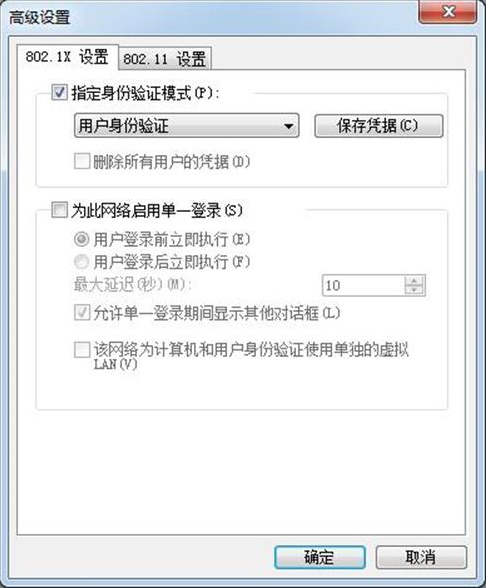
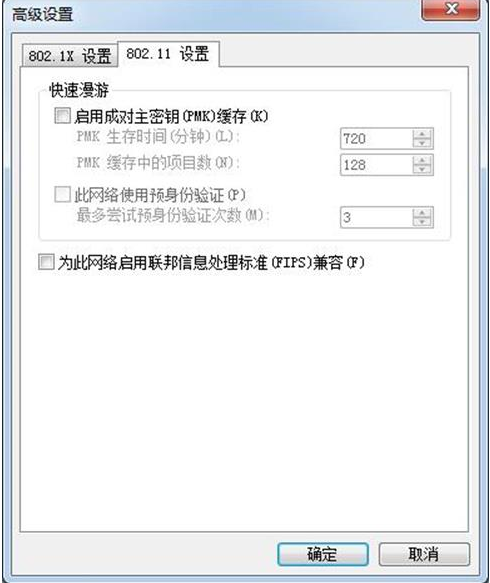
Click the "802.11 Settings" tab, uncheck the check box in front of "Enable Pairwise Master Key (PMK) Cache", and then click the <OK> button.
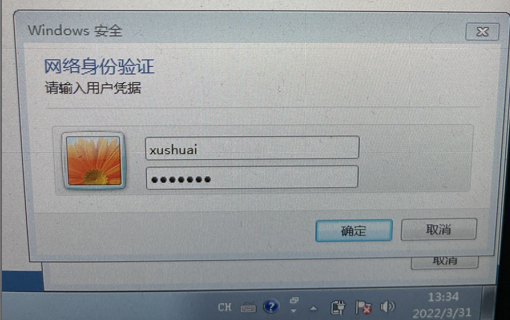
In this way, when connecting to ssid, you need to enter the username and password of dot1x.