Network Topology
ISE server---DUT---Client
Problem Description
- Configuring CS ISE-based 802.1X PEAP authentication
Process Analysis
Configure the devices and server to meet the following requirements:
• The client must pass 802.1X PEAP authentication to access the network.
• The ISE server assigns an authorization VLAN to the client after the client passes 802.1X PEAP authentication.
Solution
Configuring the DUT
1. Configure the DUT to use EAP relay to authenticate the 802.1X client.
[DUT] dot1x authentication-method eap
2. Configure a RADIUS scheme:
# Create RADIUS scheme ise.
[DUT] radius scheme ise
# Specify the ISE server at 10.0.10.141 as the primary authentication server and specify a shared key for secure communication with the server. Make sure the shared key is the same as the shared secret configured on the ISE server.
[DUT-radius-ise] primary authentication 10.0.10.141 key simple expert
# Exclude the domain name from usernames sent to the ISE server.
[DUT-radius-ise] user-name-format without-domain
# Specify 192.168.0.53 as the NAS IP address of RADIUS packets sent to the ISE server.
Make sure the NAS IP address is the same as that specified on the ISE server for the DUT.
[DUT-radius-ise] nas-ip 192.168.0.53
[DUT-radius-ise] quit
3. Configure an ISP domain:
# Create ISP domain ise.
[DUT] domain ise
# Configure the ISP domain to use RADIUS scheme ise as the default methods for user
authentication and authorization.
[DUT-isp-ise]authentication lan-access radius-scheme ise
[DUT-isp-ise]authorization lan-access radius-scheme ise
[DUT-isp-ise]quit
4. Enable dot1x authentication on access port:
[DUT]interface GigabitEthernet 1/0/23
[DUT-GigabitEthernet1/0/23]dot1x
[DUT-GigabitEthernet1/0/23]dot1x mandatory-domain ise
[DUT-GigabitEthernet1/0/23]dot1x port-method portbased
Configuring the ISE server
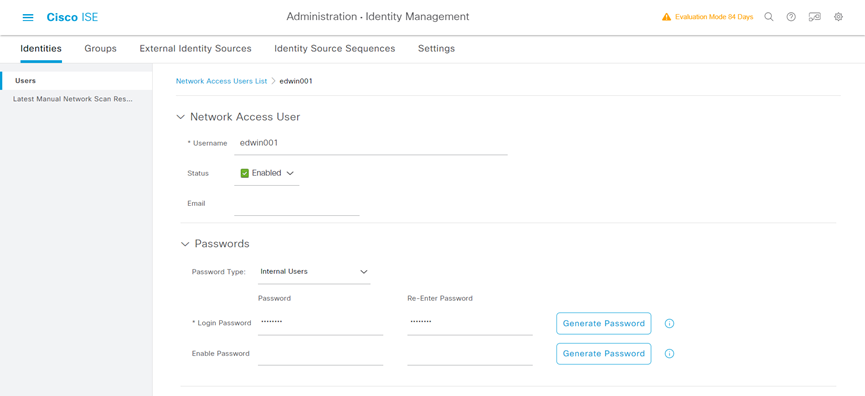
1. Create a network access user:
a) On the top navigation bar, select Administration > Identity Management > Identities.
b) From the left navigation pane, select Users.
c) Click Add.
d) On the page that opens, set the name to edwin001 and password to Pxxxxxx.
Make sure the password contains uppercase letters, lowercase letters, and digits.
e) Click Submit.
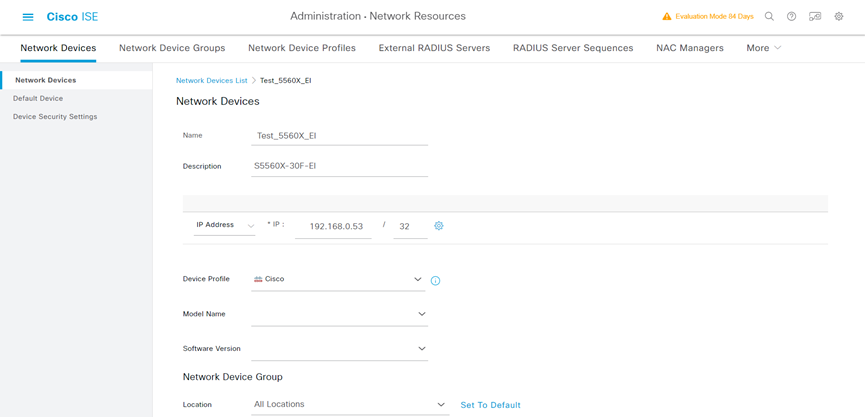
2. Add the DUT to the server as a network access device:
a) On the top navigation bar, select Administration > Network Resources > Network Devices.
b) Click Add.
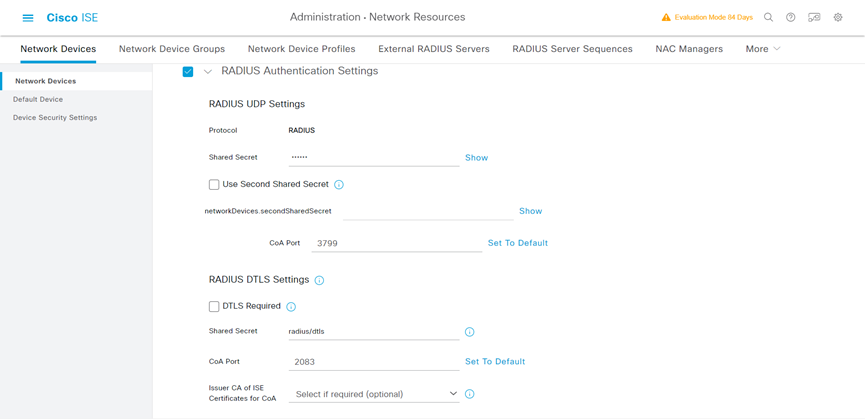
c) Set the name to DUT, specify IP address x.x.x.x, select RADIUS Authentication Settings, and set the shared secret to expert.
Make sure the IP address is the same as the NAS IP address of RADIUS packets on DUT.
Make sure the shared secret is the same as the shared key configured on DUT.
d) Save the configuration.
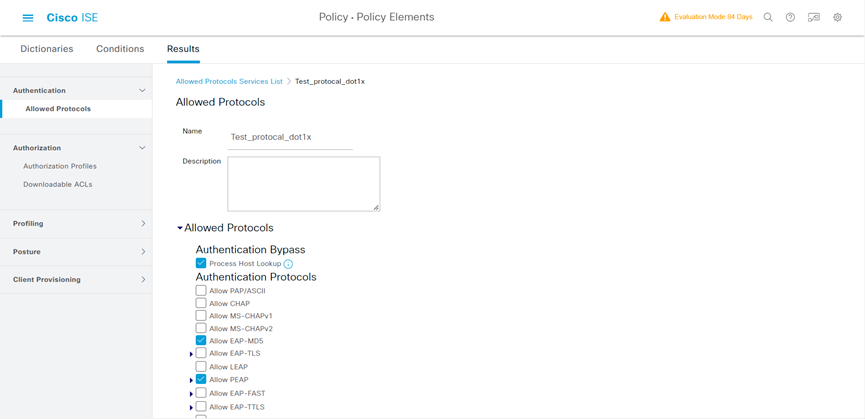
3. Configure authentication protocols:
a) On the top navigation bar, select Policy > Policy Elements > Results.
b) From the left navigation pane, select Authentication > Allowed Protocols.
c) Create an allowed protocols service named Test_protocal_dot1x, and select Allow EAP-MD5 and Allow PEAP.
d) Save the configuration.
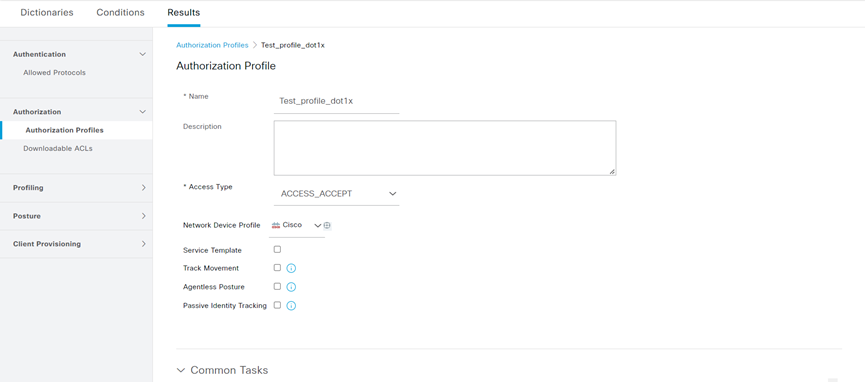
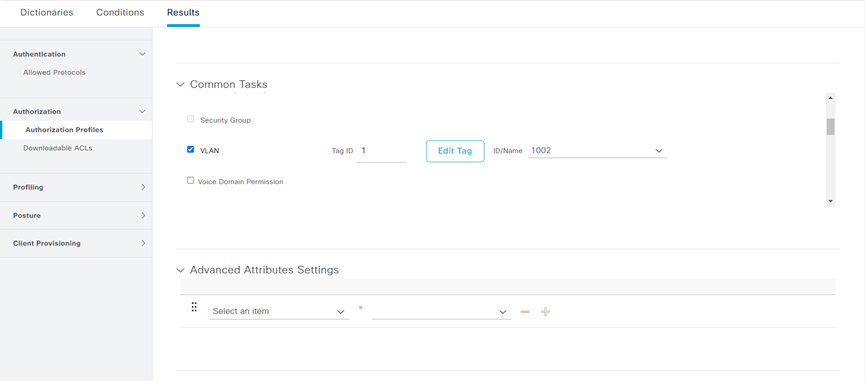
4. Configuring an authorization profile:
a) On the top navigation bar, select Policy > Policy Elements > Results.
b) From the left navigation pane, select Authorization > Authorization Profiles.
c) Click Add.
d) In the Authorization Profile area, set the name to Test_profile_dot1x and select Cisco from the Network Device Profile field. In the Custom Tasks area, select the VLAN option and enter 1002 in the ID/Name field.
e) Save the configuration.
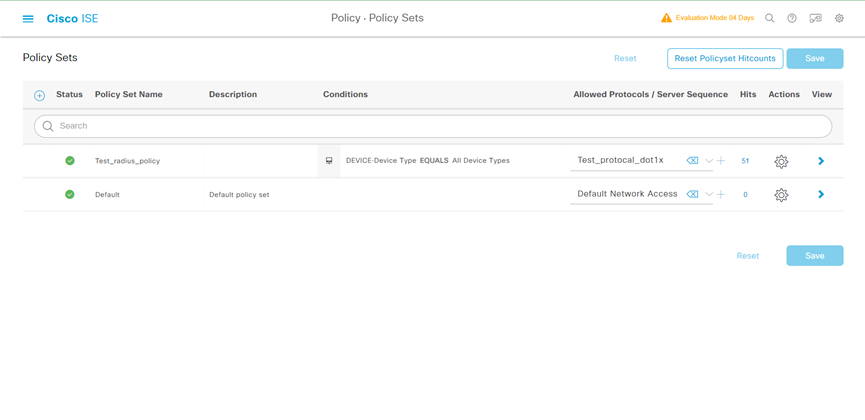
5. Configure an authentication and authorization policy set:
a) On the top navigation bar, select Policy > Policy Sets.
b) Click the plus icon + under Policy Sets.
c) Set the policy set name to Test_radius_policy. Set the conditions name to match all device type, and select Test_profile_dot1x from the Allowed Protocols/Server Sequence list.
d) Click the icon in the View column for the authentication and authorization policy set.
e) In the Authorization Policy area, add an authorization policy and change the Conditions and Profiles as shown:
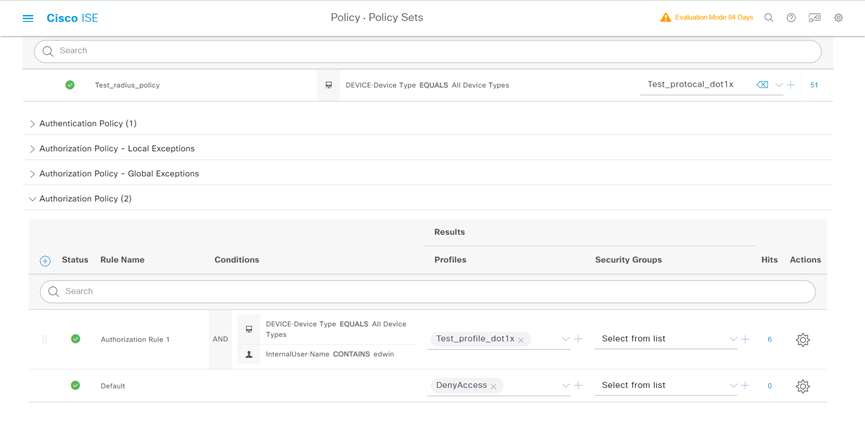

f) Save the configuration.
Verifying the configuration
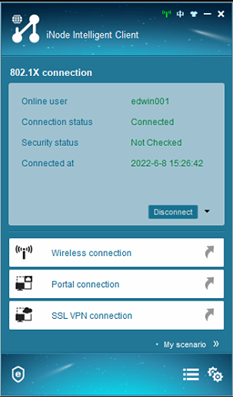
1. Start dot1x authentication on Client
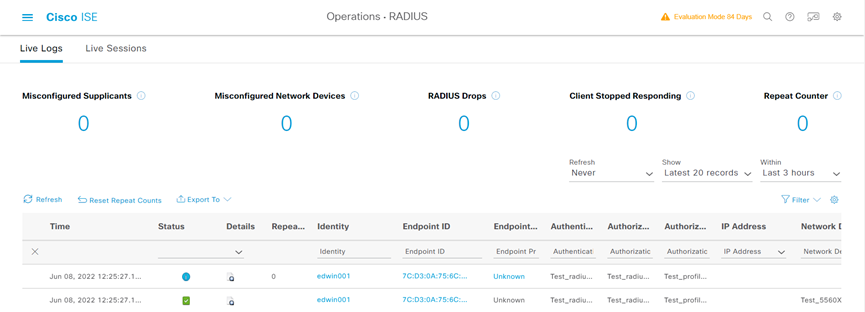
2. On the top navigation bar, select Operations > RADIUS > Live Logs. View live log information for online clients.
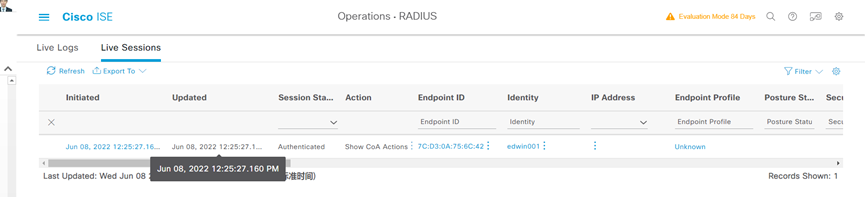
3. On the top navigation bar, select Operations > RADIUS > Live Sessions. View live session information for online clients.
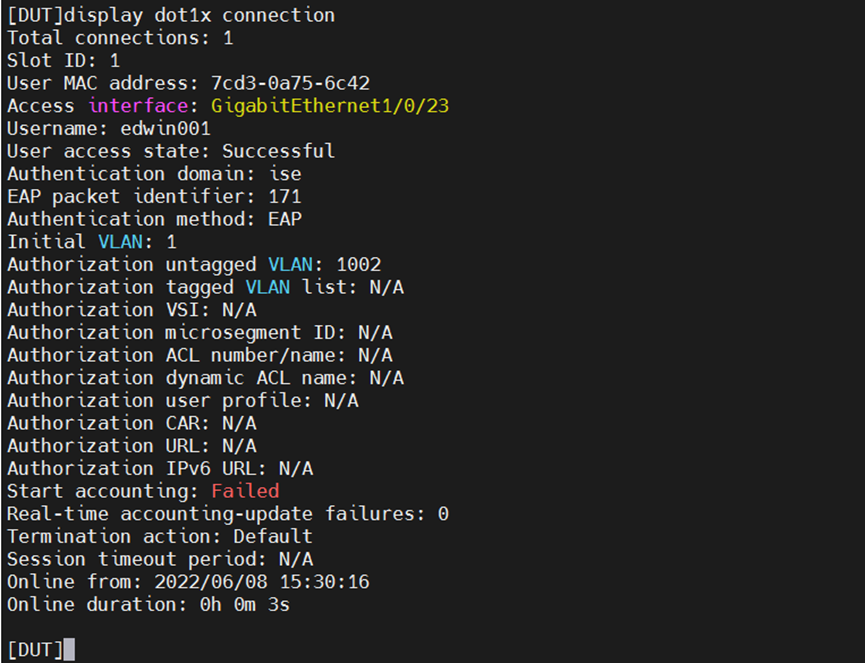
4. Check the dot1x session on DUT