★ H3C Comware V7 device HWTACACS Authentication by CS ISE Server Configuration Examples
- 0 Followed
- 0Collected ,6451Browsed

Network Topology
ISE---DUT---Client
Problem Description
Configuring
C ISE-based HWTACACS authentication for SSH login
Process Analysis
As shown, the PC is connected to the DUT. The ISE server performs HWTACACS authentication for the client when the client logs in to the DUT through SSH.
The client has the following permissions after it logs in to the DUT through SSH:
• Has the permissions of the level-15 user role.
• Cannot access the display cpu-usage command.
Solution
Procedures
Configuring the DUT
1. Configure an HWTACACS scheme:
# Create HWTACACS scheme ise
<DUT> system-view
[DUT] hwtacacs scheme tac
# Specify the ISE server at 10.0.10.141 as the primary authentication, authorization, and accounting servers and specify a shared key for secure communication with the ISE server. Make sure the shared key is the same as the shared secret configured on the ISE server.
[DUT-hwtacacs-ise] primary authentication 10.0.10.141 key simple expert
[DUT-hwtacacs-ise] primary authorization 10.0.10.141 key simple expert
[DUT-hwtacacs-ise] primary accounting 10.0.10.141 key simple expert
# Exclude the domain name from usernames sent to the ISE server.
[DUT-hwtacacs-ise] user-name-format without-domain
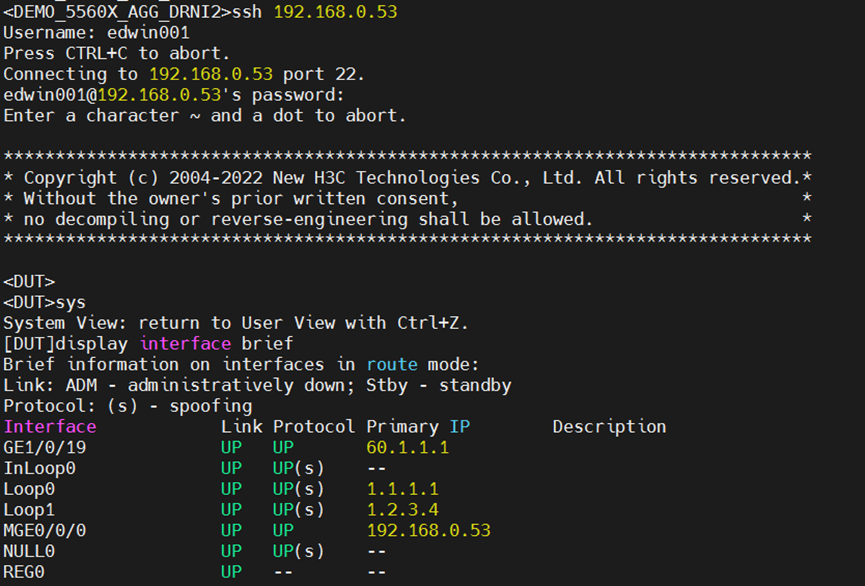
# Specify 192.168.0.53 as the NAS IP address of HWTACACS packets sent to the ISE server.
Make sure the NAS IP address is the same as that specified on the ISE server for the DUT.
[DUT-hwtacacs-ise] nas-ip 192.168.0.53
[DUT-hwtacacs-ise] quit
2. Configure an ISP domain:
# Create ISP domain ise.
[DUT] domain ise
# Configure the ISP domain to use HWTACACS scheme ise for login user authentication and authorization and to not perform accounting for login users.
[DUT-isp-ise] authentication login hwtacacs-scheme ise
[DUT-isp-ise] authorization login hwtacacs-scheme ise
[DUT-isp-ise] accounting login none
# Configure the ISP domain to use HWTACACS scheme ise for command authorization and accounting.
[DUT-isp-ise] authorization command hwtacacs-scheme ise
[DUT-isp-ise] accounting command hwtacacs-scheme ise
[DUT-isp-ise] quit
# Configure the domain ise as default
[DUT] domain default enable ise
3. Enable the default role feature.
[DUT] role default-role enable
4. Enable command authorization and accounting.
[DUT] line vty 0 63
[DUT-line-vty0-63] authentication-mode scheme
[DUT-line-vty0-63] command authorization
[DUT-line-vty0-63] command accounting
[DUT-line-vty0-63] quit
Configuring the ISE server
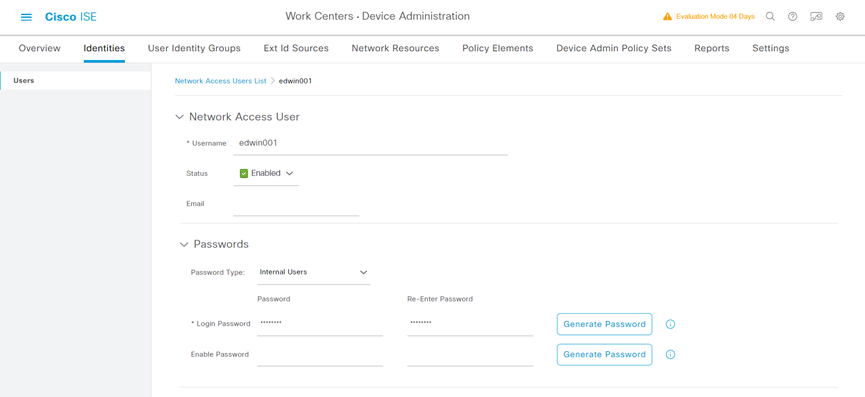
1. Create a network access user:
a) On the top navigation bar, select Work Centers > Device Administration > Identities.
b) From the left navigation pane, select Users.
c) Click Add.
d) On the page that opens, set the name to edwin001 and password to Pxxxxxxxx
Make sure the password contains uppercase letters, lowercase letters, and digits.
e) Click Save.
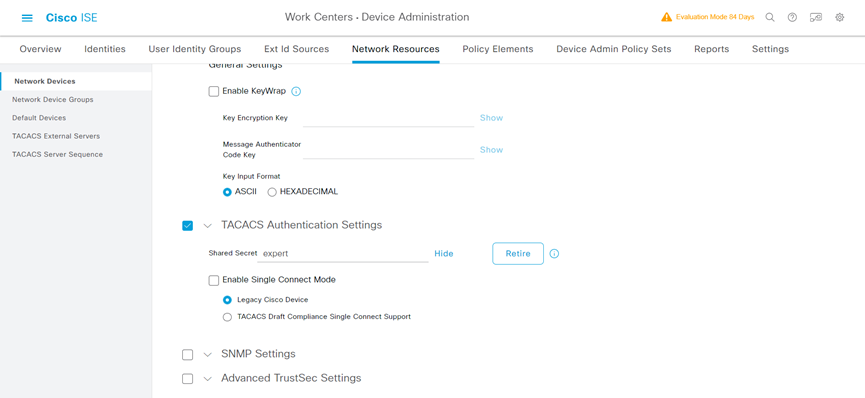
2. Add the AC to the server as a network access device:
a) On the top navigation bar, select Work Centers > Device Administration > Network Resources.
b) From the left navigation pane, select Network Devices.
c) Click Add.
d) On the page that opens, set the name to Test_5560X_EI, specify IP address 192.168.0.53, select TACACS Authentication Settings, and set the shared secret to expert.
Make sure the IP address is the same as the NAS IP address of HWTACACS packets on the DUT.
Make sure the shared secret is the same as the shared key configured on the DUT.
e) Save the configuration.
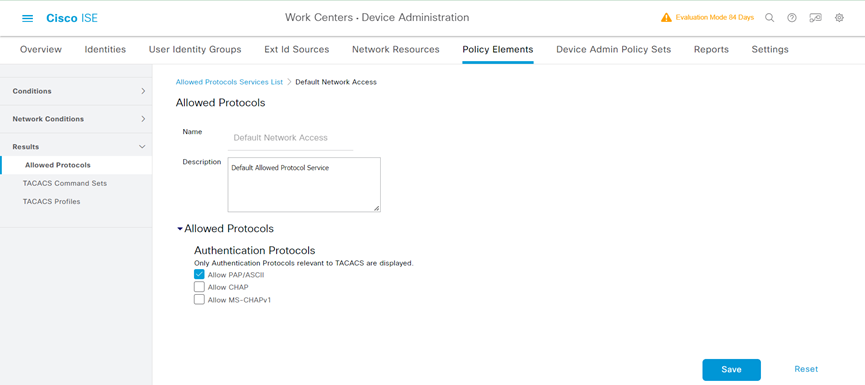
3. Configure authentication protocols:
a) On the top navigation bar, select Work Centers > Device Administration > Policy Elements.
b) From the left navigation pane, select Results > Allowed Protocols.
c) Use the default allowed protocols service named Default Device Admin.
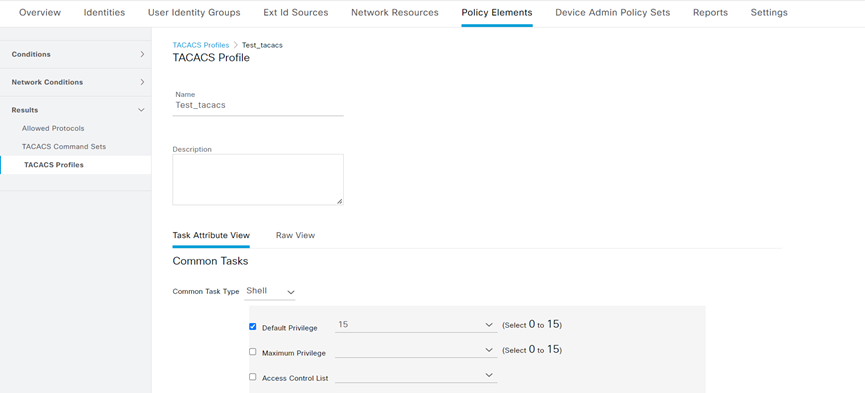
4. Configure a TACACS profile:
a) On the top navigation bar, select Work Centers > Device Administration > Policy Elements.
b) From the left navigation pane, select Results > TACACS Profiles.
c) Click Add.
d) On the page that opens, set the name to Test_tacacs, select Default Privilege, and set the default privilege to level 15.
e) Save the configuration.
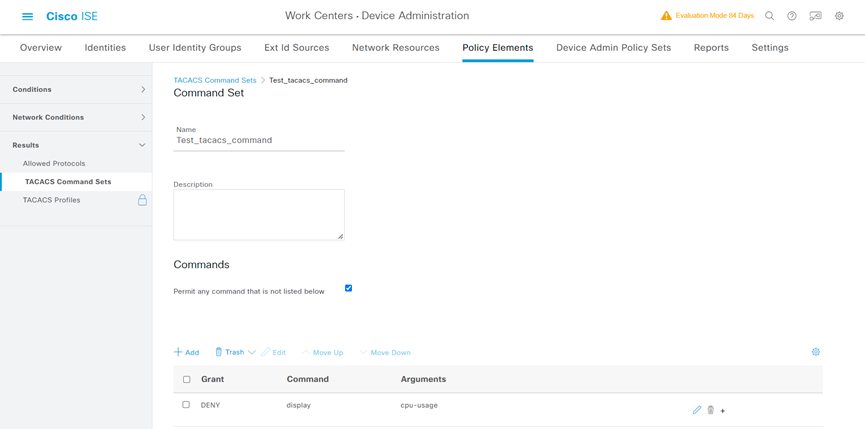
5. Configure a TACACS command set:
a) On the top navigation bar, select Work Centers > Device Administration > Policy Elements.
b) From the left navigation pane, select Results > TACACS Command Sets.
c) Click Add.
d) On the page that opens, set the name to Test_tacacs_command. In the Commands area, select Permit any command that is not listed below and deny the display cpu-usage command.
e) Save the configuration.
6. Configure an authentication and authorization policy set:
a) On the top navigation bar, select Work Centers > Device Administration > Device Admin Policy Sets.
b) Click the plus icon + under Policy Sets.
c) Set the policy set name to Test_tacacs_policy.
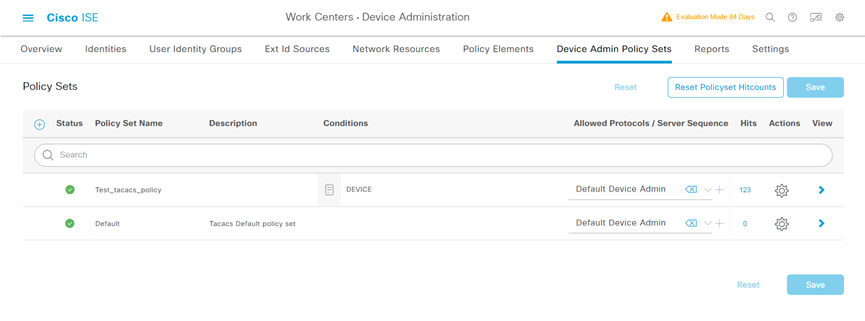
d) Click the icon in the View column for the authentication and authorization policy set named Test_tacacs_policy.
e) In the Authorization Policy area, add an authorization policy as follow:
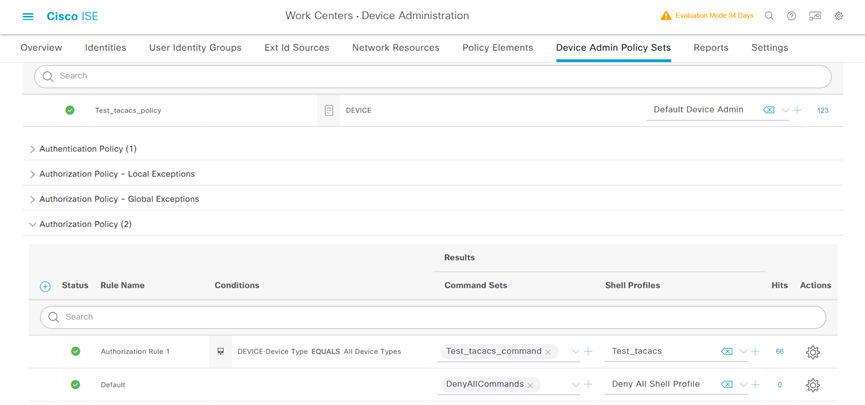
f) Save the configuration.
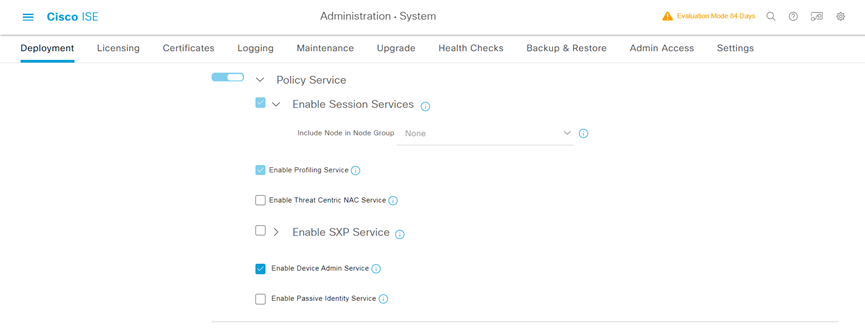
7. Enable device access authentication service:
a) On the top navigation bar, select Administration > System > Deployment.
b) Select the admin node, and then click Edit.
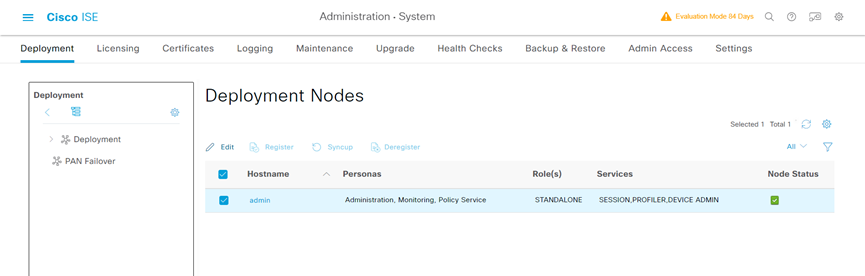
c) On the page that opens, select the Enable Device Admin Service option and save the configuration.
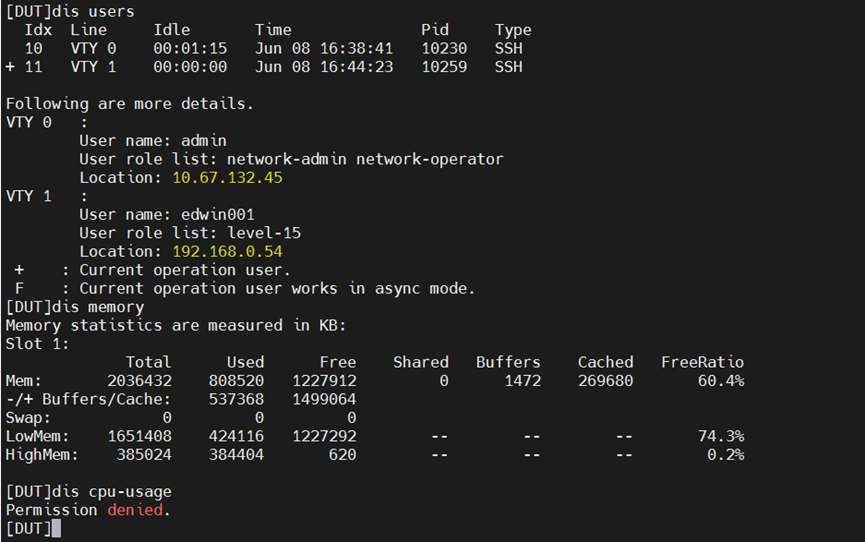
Verifying the configuration
1. Verify that the client can log in to the AC through SSH after it provides the correct username and password.
2. Verify that the client can access only commands permitted by the level-15 role. For example, the client can access the display memory command. Verify that the client cannot access the display cpu-usage command.